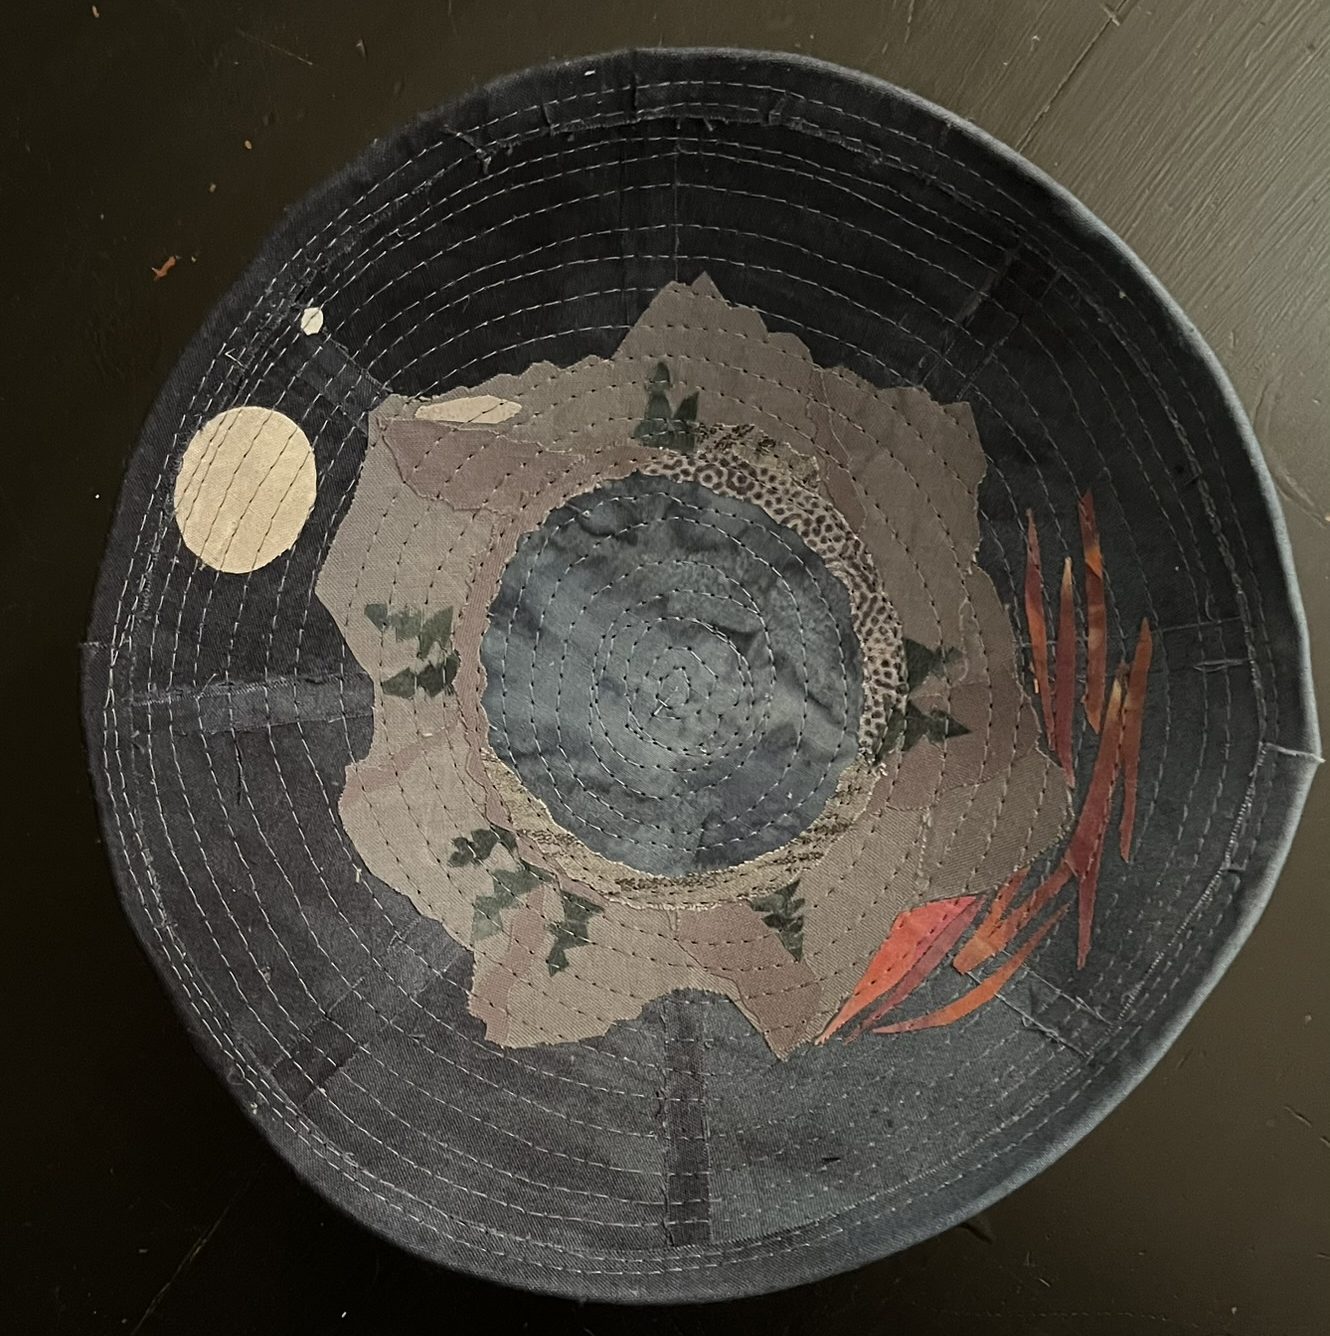
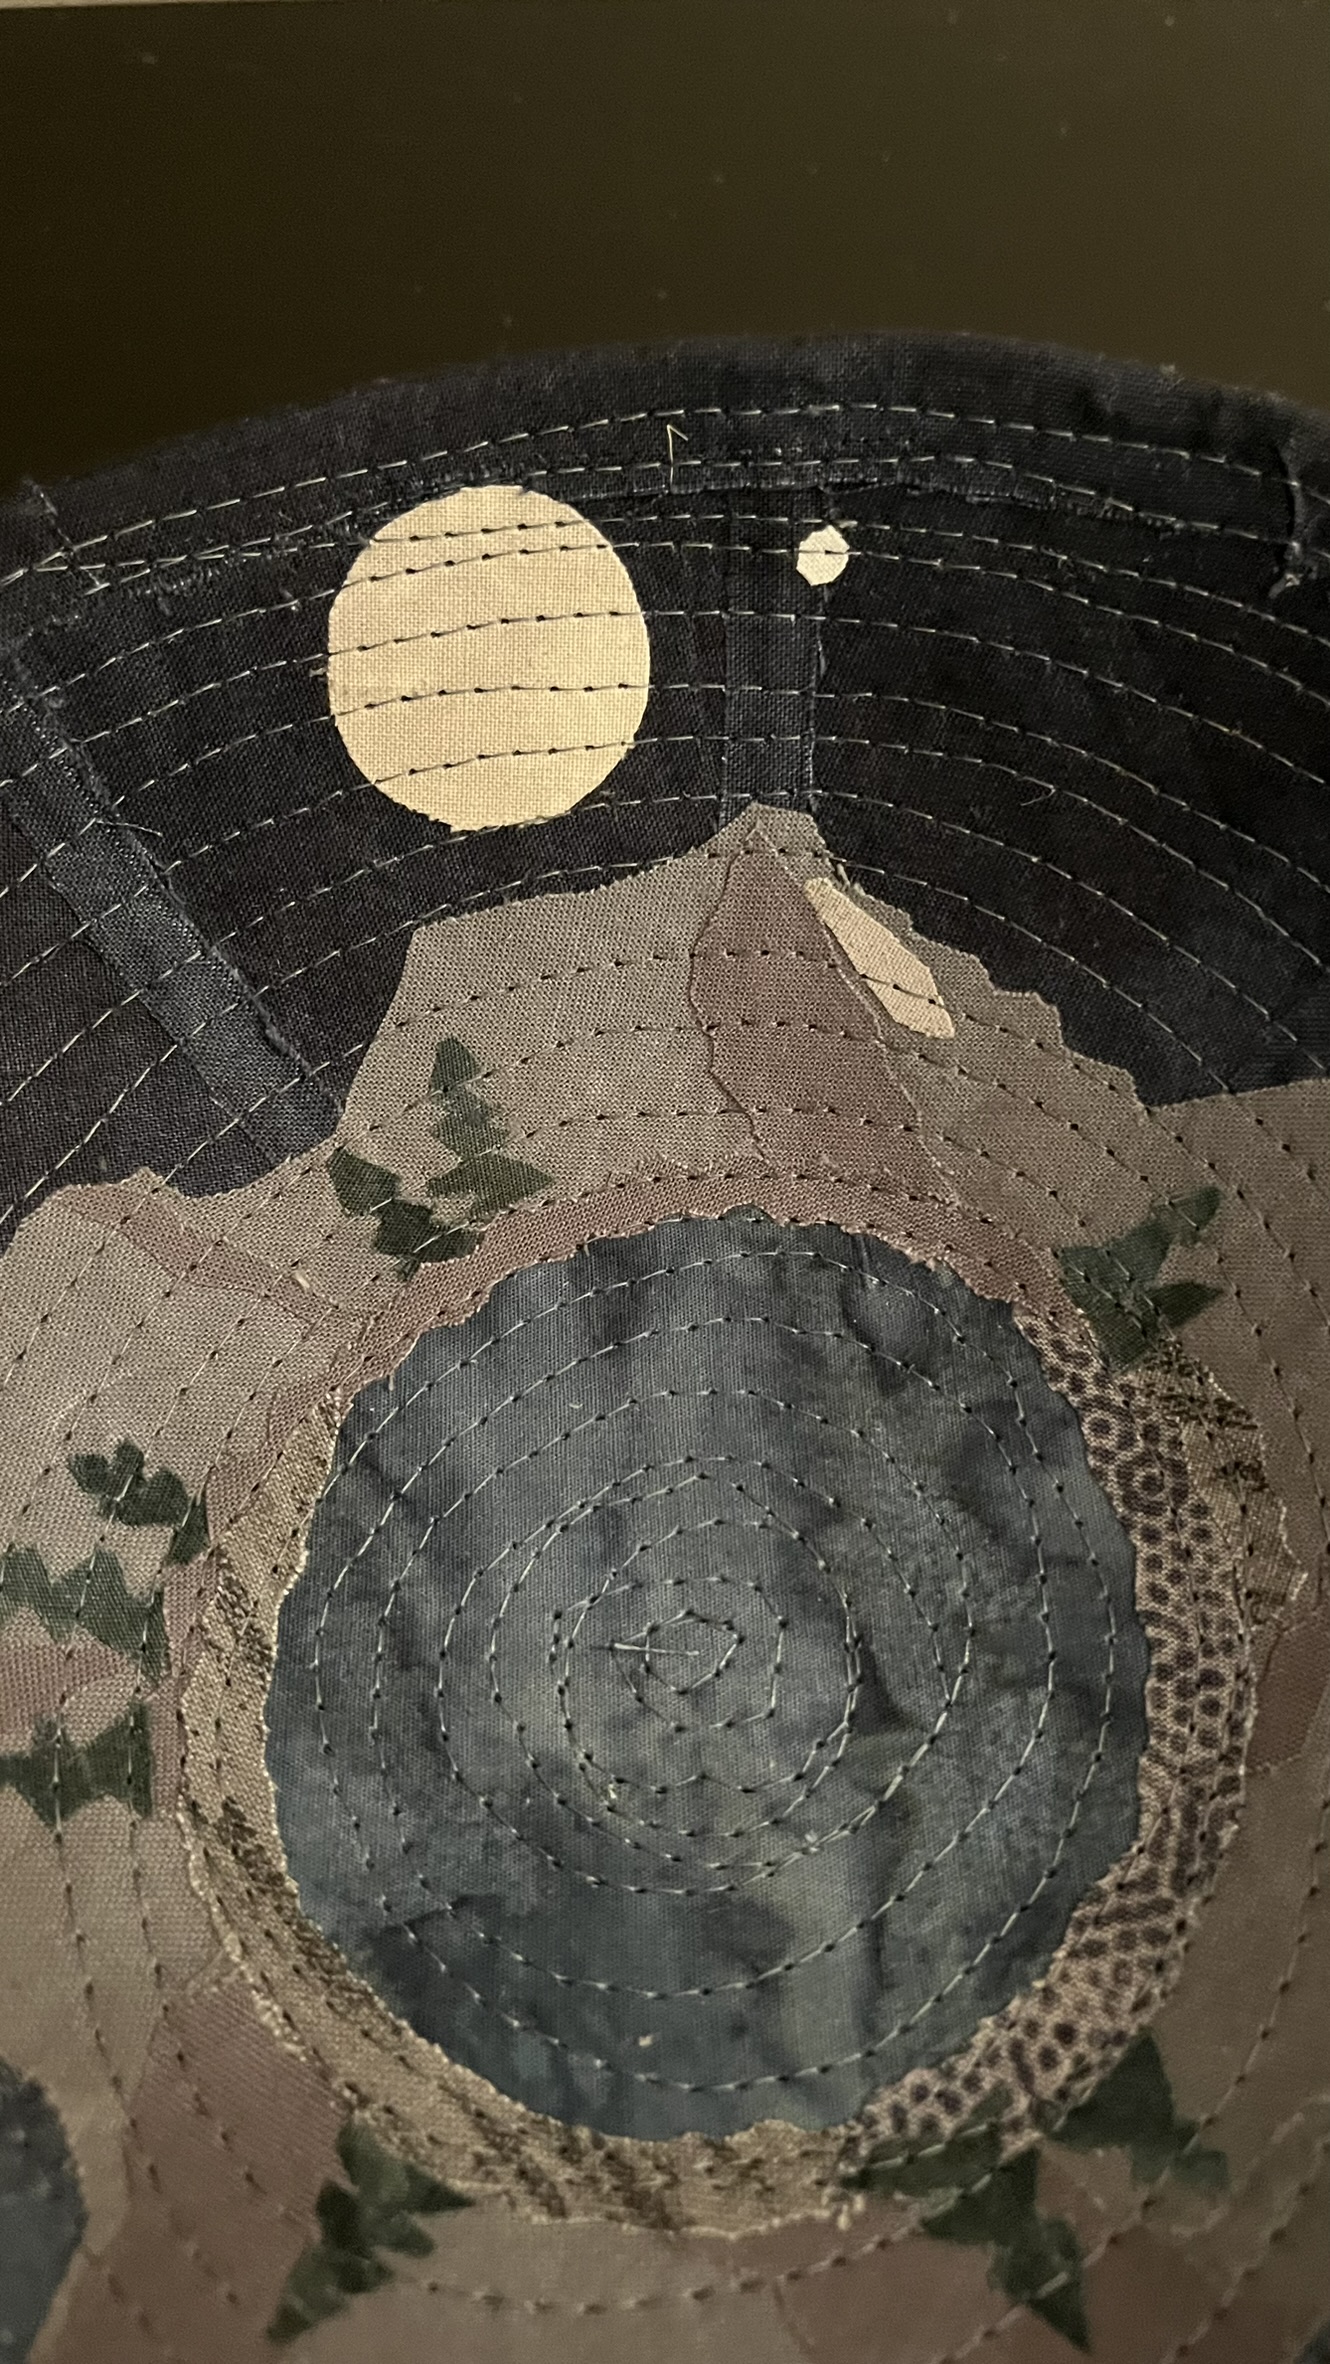
Closeup, "Kirsten"

Hundreds of Hexies

So thrilled my art quilt “Kirsten” is in ArtPrize 9, a huge international art competition in Grand Rapids, Michigan!

Kirsten Art Quilt by Carolyn Zinn

“Kirsten”

“Kirsten” (named after my daughter) is 54 inches wide and 81 inches tall. I created it by sewing together 480 fabric hexagons by hand, using the English Paper Piecing technique, which involves wrapping paper shapes in fabric and then stitching the fabric together.  Approximately 60 different commercial fabric prints were used. I quilted it using mono-filament thread on my home sewing machine.

I’m often asked how long it took me to make. I don’t really keep track, but I would guess almost 200 hours total. I probably spent about 80 hours over the course of 4 weeks creating fabric hexagons and carefully choosing the placement of each hexagon on my design wall, guided by a reference photo. I didn’t start sewing anything together until all 480 hexies were in their final location and orientation.  Then I probably spent 100 hours over the course of 2½ months hand-sewing the hexies together (being careful not to rotate or disorder anything!)  Quilting and binding took about 10 more hours.

“The amazing thing seeing this close up is that these are large quilt hexagons, in some heavily patterned colors, (and some white with writings on them), which does not look at all like any picture. Then, miraculously, as one steps back a few more feet….all of a sudden, it is a picture, and even like a painting!”
– Quilt Viewer

I hope you can see it in person, on the upper level of the Gerald R. Ford Presidential Museum through October 8, 2017.  Please view it from a distance as well as close up – I think the difference is amazing!  If you agree, I’d love your vote! Please use code 64662! 

Brown Bag Challenge

The art quilting group I belong to held a “brown bag challenge.” No, we didn’t make quilts out of brown bags! We were each given a plain brown paper lunch bag and asked to put three items into it, with which a small 12″x12″ art quilt could be made. We exchanged bags anonymously and had two months to create something artful for the contributor.

The bag I selected contained three pieces of fabric – saturated  hand-dyes in cherry red and marine blue, and some Kaffe Fasset Shanty Town in the same colorway — and some green perle cotton floss.

The contents of my challenge bag

The contents of my challenge bag


pwbm047purpl

Shanty Town Purple by Brandon Mably for Kaffe Fassett Collection Westminster

I needed to sleep on it.

I decided to do a modified “stack and whack” with that house print. Stack-and-whack usually involves cutting 8 identical triangle blocks and rotating them to form an 8-sided kaleidoscope effect.  I only had 4 repeats of the pattern available, so I cut tiny 1.5″ squares, rotated them and joined them to form 2″ finished sized blocks.

I added some of the red, because it had nice directional streaking,  and a bit of complementary Kaffe fabric from my stash. I arranged the tiny blocks in a corner-to-corner color wave from blue to purple to red, with fun pops of green from the prints.

The assembled top, 13″x 13″

But I wasn’t finished. The agreement was to use a recognizable amount of each of the contributed items. I still had green embroidery cotton to feature somehow.

I needed to sleep on it again.

So many angles in that Shanty Town print. So many squares in my piecing.  The quilt needed something soft, curvy, organic.  And I could introduce that with embroidery.

I chain-, blanket- and feather-stitched an insect-like web right over that angular grid of whacked houses. I kind of love the results.

Face cards

Craft Napa 2017

Last week I had the most fun experience attending Craft Napa 2017 in Napa California!

It was a whirlwind three days of sewing, glueing, cutting, sharing, learning and laughing!

I took three workshops, each taught incredibly well by a different very talented artist.

With Lyric Kinard‘s “Crazy Collaborative Collage” workshop, we went back to the basic elements of design: color, value, line, shape and texture; and practiced design principles of balance, relationship, focal point, repetition and unity.

Lyric's workshop

Lyric’s workshop

Lyric made it different and fun by having us practice these principles while collaborating on fabric-collage. You never knew when she was going to ask you to pass your piece to your neighbor, or get up and move to somebody else’s supplies. By doing so, she ensured we stayed focused in the process and did not get attached to the outcome, thereby enforcing her rule #1: no masterpieces!

Lyric Kinard and me

Lyric Kinard and me

Lyric's class

Classmates in Lyric’s class look over the fabric postcards we made.

Face cards

Face cards that a classmate and I made of each other. Don’t yell Lyric but I think they are masterpieces 😉

In Victoria Findlay Wolfe‘s “Thunderstruck Star Improv” workshop we used her diamond acrylic template, learned improve slashing, accurate corner piecing and Y-seams while working toward a modern take on the traditional LeMoyne star. Victoria blogged about the class here.

Victoria Findlay Wolfe

Victoria Findlay Wolfe at the sewing machine

Victoria Findlay Wolfe

Victoria Findlay Wolfe demonstrates

my Thunderstuck Star

I finished one of four eventual units of the Thunderstuck Star

In Leslie Tucker Jenison’s improv piecing workshop, we played with negative space, surrounding the “leading ladies” of our bold graphic center blocks with shades of grey “supporting actors.” We learned how small insertions/inclusions of coordinating color on the grey add “wow” and unify the quilt.

Leslie Tucker Jenison quilt

Leslie Tucker Jenison shows an example of the technique she will teach

Leslie Tucker Jenison quilt

Leslie Tucker Jenison shows another example

quilt blocks

A few of the inner blocks I made during the workshop.

Snow Day Snow Dye!

We had a snow day today, so I used the unexpected bonus time and bonus snow to do some snow-dyeing.

IMG_2761

Step 1: soak cotton fabric in soda-ash solution, crumple up and place on drainage rack in plastic tub.

IMG_2762 (Edited)

Step 2: cover with several inches of fresh snow

IMG_2764 (Edited)

Step 3: sprinkle fiber-reactive dye powder on snow. I use Procion MX.

IMG_2770 (Edited)

Step 4: Cover and wait 24 hours.

IMG_2771 (Edited)

Step 5: uncover and be amazed.  Rinse in cold water until water runs clear. Wash with synthrapol and dry.

IMG_2773 (Edited)

Step 6: press and be even more amazed.

IMG_2775IMG_2774IMG_2782

Campo di Papaveri

My dear friend Kris is getting married next month! It’s been so heartwarming to see how happy she and her fiance are. During their recent trip to Italy she shared a photo that I think perfectly captures the adventure, beauty and happiness of their new life together.

13012836_10207073393975650_7316354843688822667_n

Photo Credit Marty Green, Pezze Di Greco, Italy. April 2016

This piece measures 9.5″ x 15″ and I made it using the confetti technique  -thousands of tiny bits of fabric secured with  sheer tulle and free-motion quilting.  I titled it “Campo di Papaveri” , which is Italian for “Field of Poppies” (I hope :-))
campdipapavera

Migliori auguri! Best wishes, happy couple!


Brown Bag Challenge

I recently participated in a brown bag challenge with my art quilting group. Each participant was asked to bring three items in a brown lunch bag to be used in a small art quilt. Everyone took home a random bag that wasn’t their own, and had two months to use the items to create a 12″x12″ art quilt.

I was so excited as I opened my brown bag because I knew instantly that my friend Jackie had placed the items I found within it.

img_0843c

It contained cuts of 5 hand-dyed fabrics, a baggie of colorful marble-sized  woolen balls and half-dollar-sized woolen discs, and a playfully tied bundle of silk ribbon and perle cotton embroidery floss.

img_1985

The planning begins! A preliminary layout for the fabric, and a sketch for the embroidery.

img_2008

The pieced base layer takes shape.  Jackie’s hand-dyes were supplemented with a few from my stash.

img_1089c

The completed piece. The original design was rearranged to incorporate a quote from Rumi that I heard while working on the embroidery: “This turning toward what you deeply love saves you.” It resonated with me in a way that I thought Jackie might feel too.

img_1092c

The complete poem is printed onto fabric and applied to the back side.

img_23091


Into the Blue

I got to play with silk dyes this week! So much fun now that I have a proper frame for stretching my silk. Hubby built me a simple frame out of 1×4’s with a 14″ x 72″ opening. I tack damp silk in the opening, and I have a perfectly stretched canvas for silk painting.

silk scarf with glue resist

silk scarf pinned to frame

First, I used a favorite serti-resist method, with Elmer’s washable school glue. I drew lines and shapes with the glue directly onto the silk.

silk scarf with glue resist

silk scarf with glue resist

After the glue was dry, I painted the spaces within the glue lines with Jacquard Green Label silk dyes. I love these dyes because they can be mixed and lightened with the addition of water.

I also like the way they react to rock salt and rubbing alcohol to add texture to the surface.

After letting the dye dry for 24 hours, I set the dye by steaming the scarf. I don’t have any special apparatus for this. I roll the scarf in blank newsprint and place it on a rack in my canning kettle above boiling water for 30 minutes.

The glue can be rinsed out of the silk with a mild detergent (I use Woolite) and some mild scrubbing with an old soft toothbrush. It helps to let the scarf soak before scrubbing.

glue-serti dyed silk scarf

glue-serti dyed silk scarf

Loving my new frame and too impatient to wait for glue to dry again, I dyed the next couple of scarves without a resist.

These scarves were painted without a resist

These scarves were painted without a resist

For this one, I painted arcs of varying shades of blue and green. Then I sprinkled rock salt over the wet dye to pull the dye and form the interesting concentrations of dye.

IMG_0816c

Freehand painting, with rock salt effects

For this scarf, I relied on rubbing alcohol to help disperse the dye and form rings. For each ring, I dropped a 50% alcohol/water mix onto the silk, and then painted a circle around the drop. This kept the dye from filling in the circle. I covered the silk with circles in this manner and them the dye dry completely before adding another layer, then another, then another.

IMG_0815c

Freehand painting, with rubbing alcohol effects

So many beautiful scarves, so few days to wear them!

Whorl

(noun \ˈhwȯr(-ə)l, ˈwȯr(-ə)l, ˈ(h)wər(-ə)l\) something that whirls, coils, or spirals or whose form suggests such movement.

This small art quilt started as an exploration of texture. As many of my pieces, it was prompted by a monthly challenge from my Art Quilt Group.

I first hand-dyed a length of fine china silk, then started tucking and gathering with matching thread. I didn’t have any plan for the final outcome; it evolved organically into the nautilus shape. The silk was backed by a double layer of cotton batting, then embellished with glass beads and my favorite variegated silk embroidery floss. Finally, I finished the edges in the naturally irregular shape it had become, and mounted it on a crisp-cornered pillowcase-finished eggplant Kona cotton base.

Bonus! See this piece, three others of mine, and many other fine works by my Art Quilt Group at the June 2016 Art Hop at Ninth Wave Studio in Kalamazoo. June 3, 2016 5pm-8pm.

To Have and to Hold and to Snuggle

My awesome nephew Bryan is going to marry this wonderful young lady in a few months.  Morgan’s bridal shower was yesterday, and I couldn’t have been more excited as she unwrapped this throw quilt I made for them.  I used about 16 different text fabrics, most with expressions of love, and worked in their initials to personalize it.  Best wishes, Morgan and Bryan!